
MuleSoft Anypoint Studio: Tutorial, Examples & Best Practices
MuleSoft is a complete enterprise integration solution that connects applications and services across cloud and on-premises environments. Anypoint Studio is the primary desktop IDE designed to build integration applications in MuleSoft. It provides a development environment for creating, testing, and debugging Mule applications.
Beyond basic development, Anypoint Studio combines visual flow design with powerful development tools that accelerate integration projects. For example, it provides debugging capabilities, automated testing through MUnit, and direct deployment options to various environments.
This article explores MuleSoft Anypoint Studio's essential features and development tools and shares implementation strategies to enhance your integration development workflow.
Summary of key MuleSoft Anypoint Studio concepts
{{banner-large-graph="/banners"}}
Studio architecture and workspace
MuleSoft Anypoint Studio is built on Eclipse's foundation for Mule application development. Rather than switching between separate design, coding, testing, and debugging tools, it brings your entire development lifecycle into one unified, easy-to-use environment.
Perspectives and views
Studio organizes your development workflow through three specialized perspectives optimized for different phases of integration development.
- Mule Design is your primary workspace, where you will spend most of your time building flows on the visual canvas and configuring components.
- Mule Debug provides comprehensive troubleshooting tools, including breakpoint management, payload inspection, and step-through execution.
- API Design focuses on RAML and OpenAPI specification development for API-first design approaches.
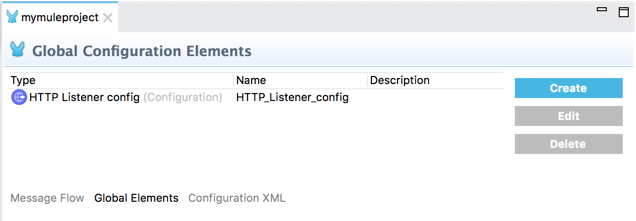
These perspectives work together with essential views that remain consistent across your workflow. For example, Package Explorer's hierarchical view lets you quickly locate any file in your project, from flow definitions to property configurations, without remembering complex file paths. The Global Elements tab contains global Mule configurations in your flows.

Editing modes
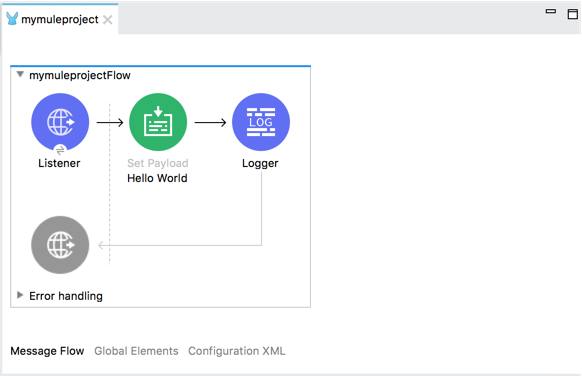
MuleSoft Studio provides two main modes for working with flows.
- Canvas mode lets you design integrations visually by dragging and connecting components, making it easier to understand the overall structure of your flow.
- XML mode lets you view and edit the underlying code, which is necessary for fine-tuning configurations or troubleshooting issues.
Both modes represent the same flow in different formats, allowing developers to switch between visual and code-based editing as needed.
Here is an example of a canvas view of a flow in Anypoint Studio and its equivalent XML view.

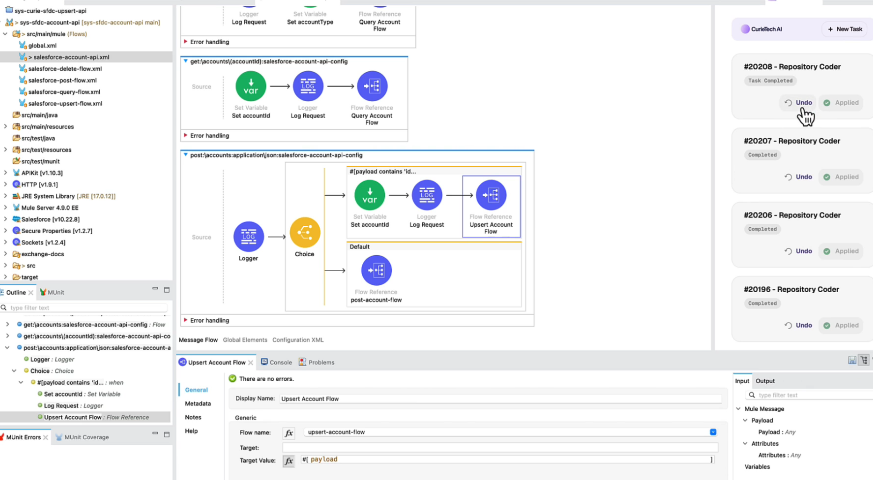
Development in Anypoint Studio has become faster and more intuitive with the CurieTech AI Plugin, an AI-powered solution designed to accelerate MuleSoft development. Integrated directly into the IDE, the plugin streamlines your development workflow.
You can install the CurieTech AI Plugin into your Anypoint Studio, and you will see all AI tools right inside your development environment.

You can now create a task by selecting it from the sidebar and making changes in your code from within the Anypoint Studio. As you create a task, it appears on the right-side panel and allows you to quickly apply changes to your code.
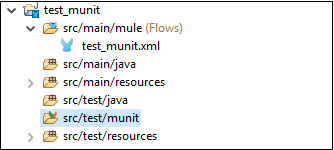
Project structure and configuration management
Studio projects follow Maven conventions, with specific folders serving different purposes. This allows you to organize code effectively and maintain consistency across development teams.
Folder organization
Studio organizes project components into distinct folders based on their function and purpose.
You will work primarily in the src/main/mule folder, defining all your flows, sub-flows, and global configurations in XML files. This centralized approach keeps your integration logic organized and easily accessible.
MuleSoft Anypoint Studio also provides separate, organized storage for everything else your application needs, such as property files, security certificates, or static resources. These resources are kept in the src/main/resources directory, giving your project a clean architecture.

Configuration files
Several key configuration files manage different aspects of your project setup:
- The mule-project.xml file stores basic project metadata and Studio-specific preferences, maintaining consistency across different development environments.
- Your pom.xml file handles Maven dependency management, including connector versions, external libraries, and build configurations that your project requires.
- The log4j2.xml file controls logging behavior during development and production runtime, determining what information gets captured and how it's formatted.
Beyond manual configuration, Maven dependency management through Anypoint Studio simplifies connector installation and version control. You add connectors directly from Exchange through the Mule Palette, and Studio automatically updates your pom.xml with the appropriate dependencies.
For example, as you add the Salesforce connector to your flow, Studio automatically adds its dependency to your pom.xml file.
<dependency>
    <groupId>com.mulesoft.connectors</groupId>
    <artifactId>mule-salesforce-connector</artifactId>
    <version>10.18.0</version>
    <classifier>mule-plugin</classifier>
</dependency>
Global elements
Global elements work like shared templates you set up once and reuse throughout your project. Instead of configuring the same database connection or HTTP listener settings in every flow that needs them, you define these configurations globally and reference them wherever required.
Secure properties
Studio also lets you set up secure properties, which ensures the safety of passwords and API keys while you develop or deploy your app.
Visual flow development
Instead of writing complex XML, Mulesoft Anypoint Studio lets you build your integrations visually. To get your integration working, drag what you need from the Mule Palette onto the canvas and connect everything.
Flow types
Knowing the different flow types significantly affects how you organize your code when building integrations.
Flows
Flows are entry points triggered by external events like HTTP requests, file changes, or scheduled tasks. They represent the primary interfaces external systems use to interact with your integration.
Sub-flows
Sub-flows work like reusable functions in programming. You build them once with specific processing logic, then call them from multiple flows throughout your application.
Private flows
Private flows run internal operations that don't need external triggers. You use them for error handling routines, background data processing, or complex business calculations.
Flow example
The example below demonstrates creating a simple REST API that receives HTTP requests, transforms data into a JSON response, and includes error handling:
- Add an HTTP Listener to receive requests:
<http:listener path="/api/customers" config-ref="HTTP_Listener_config" allowedMethods="GET"/>- Add data transformation to format responses:
<ee:transform>
    <ee:message>
        <ee:set-payload><![CDATA[%dw 2.0
output application/json
---
{
    "customers": [
        {
            "id": "123",
            "name": "Acme Corporation",
            "status": "active"
        }
    ]
}]]></ee:set-payload>
    </ee:message>
</ee:transform>
- Include error handling to manage exceptions.
<error-handler>
    <on-error-continue type="ANY">
        <ee:transform>
            <ee:message>
                <ee:set-payload><![CDATA[%dw 2.0
output application/json
---
{
    "error": "Processing failed",
    "timestamp": now()
}]]></ee:set-payload>
            </ee:message>
        </ee:transform>
    </on-error-continue>
</error-handler>
Flow tools
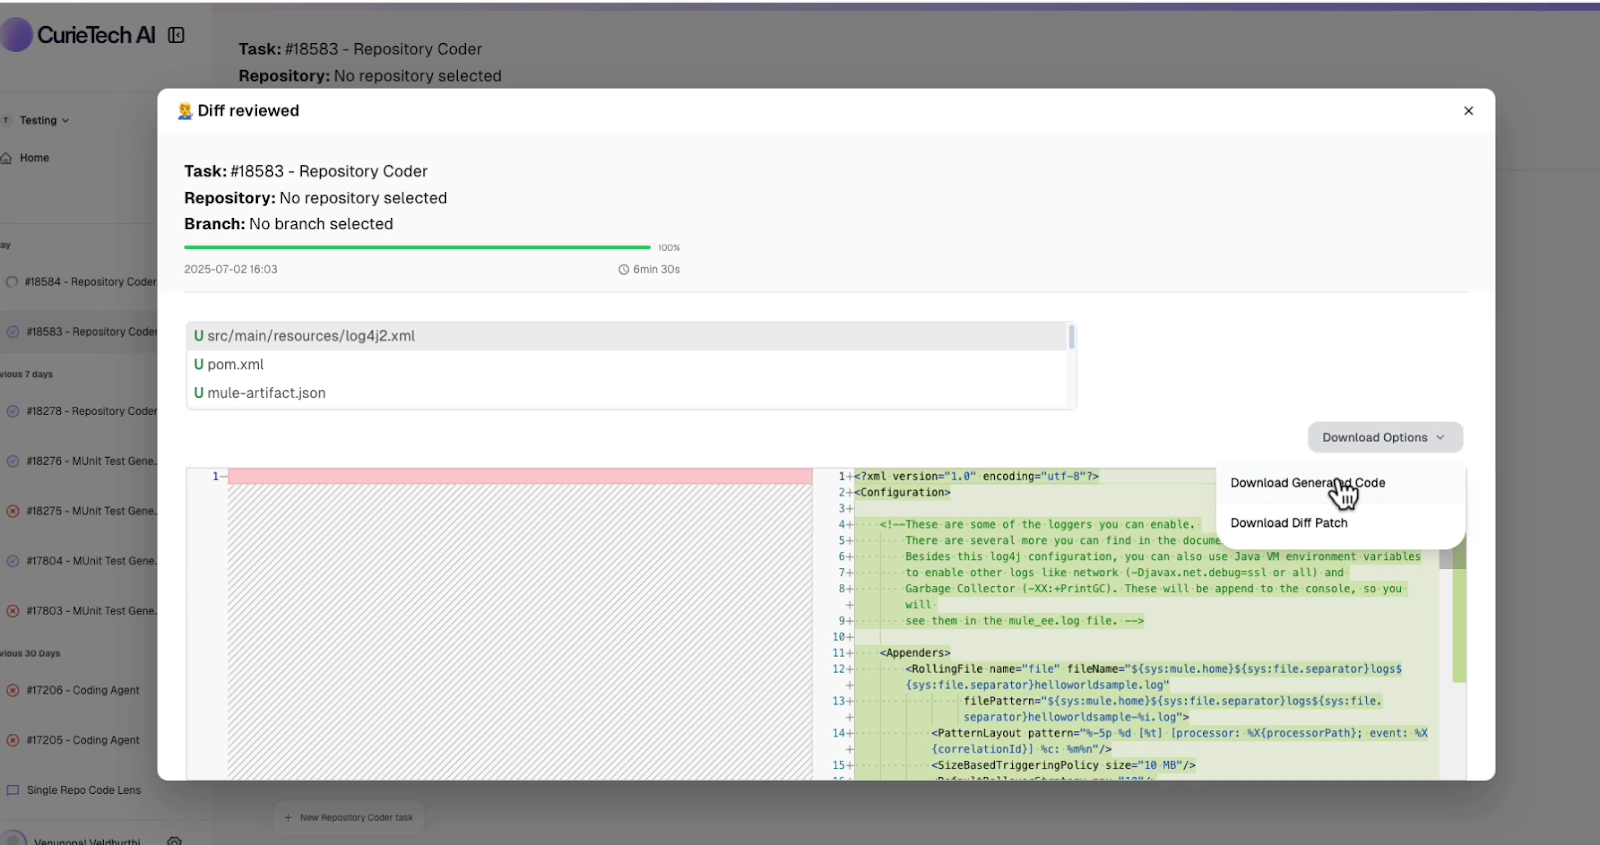
CurieTech AI provides advanced AI tools to accelerate your MuleSoft development process. The platform has various development tools to accelerate Studio-based projects. With CurieTech AI's Repository Coder, you can create full project code in minutes.
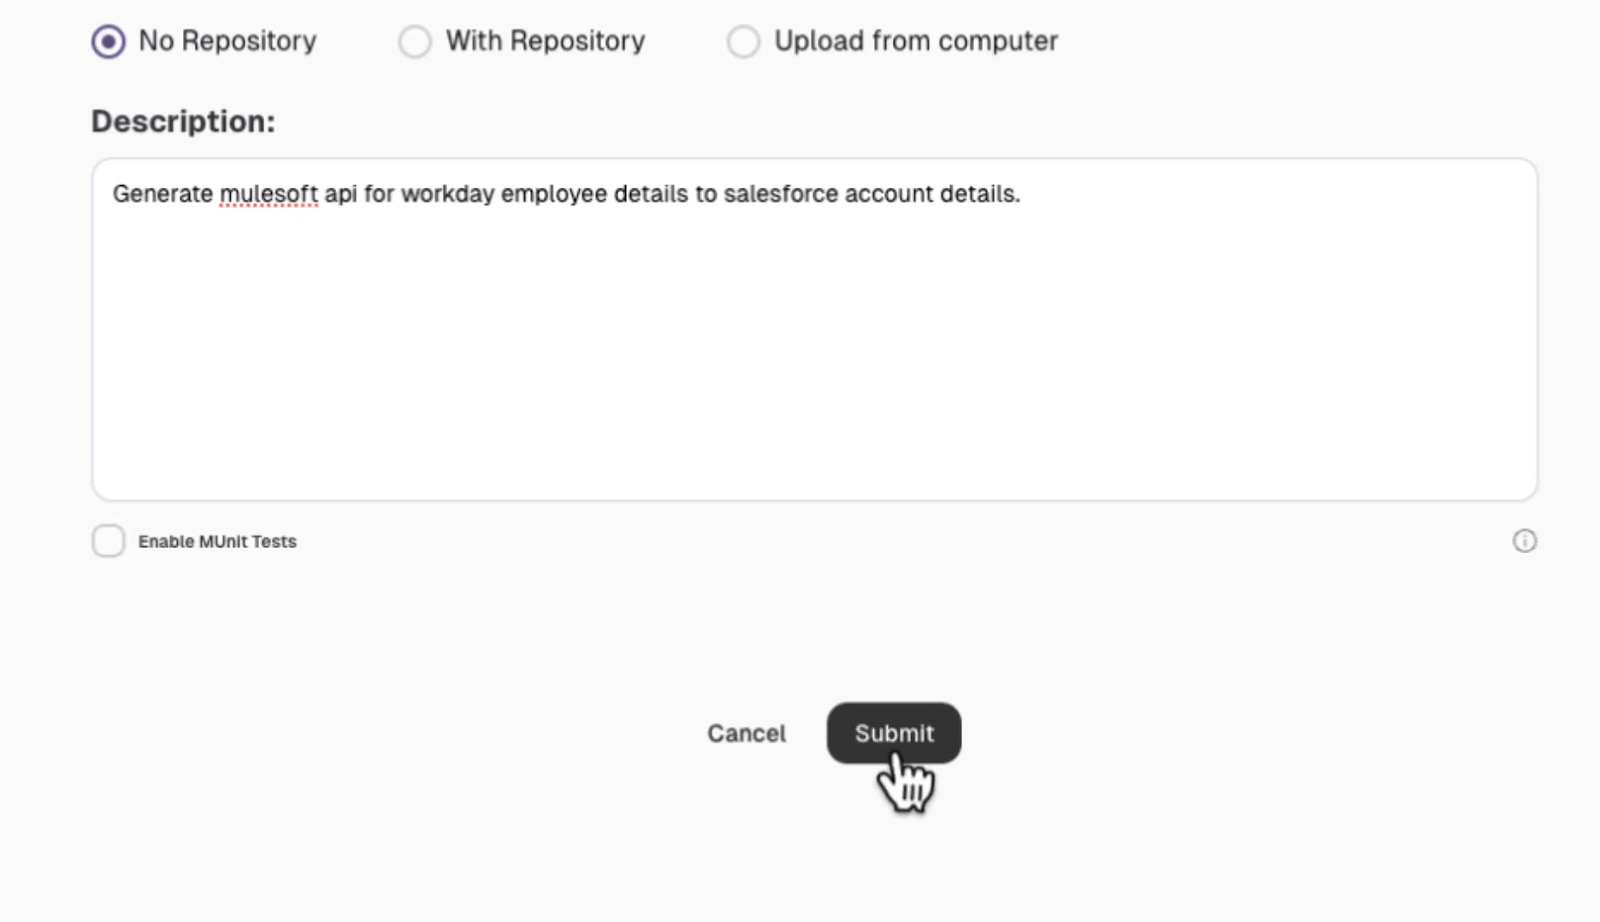
To use the Repository Coder, create a task describing your requirements and click Submit.
The tool processes the prompt and generates full project code, reducing development time from hours to minutes.
APIKit and API scaffolding
APIKit integration within Anypoint Studio enables API-first development by automatically generating flow structures from API specifications. This approach ensures that your implementation stays aligned with your API spec design.
Automatic scaffolding from RAML specifications generates flows for each resource and method and exception-handling flows for standard HTTP error codes. The generated structure includes APIKit router configuration and console setup for testing.
When you import a RAML specification, Studio creates flows named after your resources and operations. For example, a RAML defining /customers with GET and POST methods generates get:\customers:api-config and post:\customers:api-config flows.

Scaffolding an API from RAML specification:
Import your RAML file through Mulesoft Anypoint Studio's APIKit scaffolding wizard. Studio analyzes the specification and creates the basic project structure.
<apikit:config name="api-config" raml="api.raml" outboundHeadersMapName="outboundHeaders"/>
It generates flows for each endpoint defined in your RAML.
<flow name="get:\customers:api-config">
    <logger level="INFO" message="Processing GET request for customers"/>
    <!-- Add your implementation logic here -->
</flow>
Exception handling flows provide consistent error responses.
<flow name="api-apiKitGlobalExceptionMapping">
    <error-handler>
        <on-error-propagate type="APIKIT:NOT_FOUND">
            <ee:transform>
                <ee:message>
                    <ee:set-payload><![CDATA[%dw 2.0
output application/json
---
{
    "message": "Resource not found"
}]]></ee:set-payload>
                </ee:message>
            </ee:transform>
        </on-error-propagate>
    </error-handler>
</flow>
To simplify the initial step of the API-first design, you can use a tool like CurieTech AI's API Spec Generator. It streamlines the process by creating complete API specifications, such as RAML or OAS, directly from a simple text description.
To use the tool, select the API Spec Generator and choose your preferred specification format (RAML or OAS).
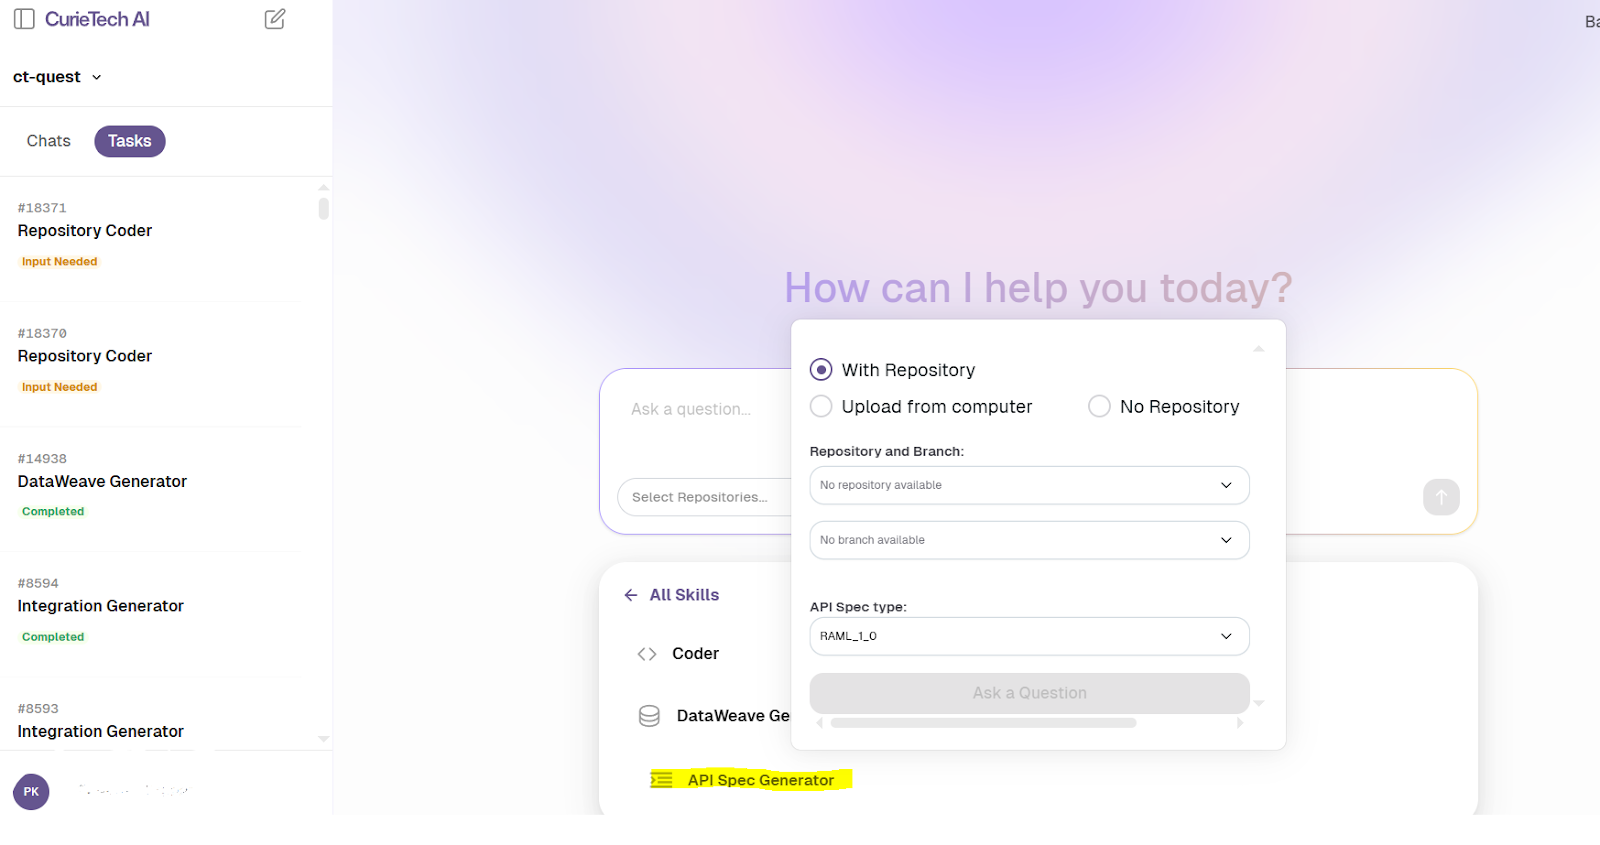
Next, enter text in the prompt area and describe your API requirements.

Based on the provided prompt, the tool generates a well-formed API specification that defines the endpoints, parameters, and response structure.

{{banner-large="/banners"}}
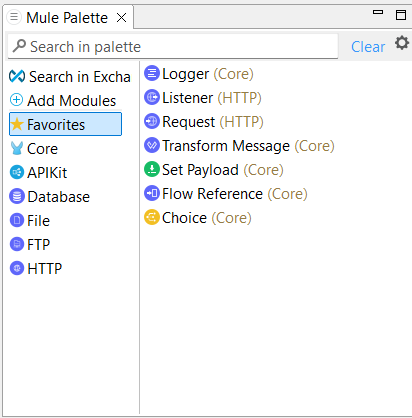
Connectors and message processors
The Mule Palette organizes components into logical categories so you can quickly pick the right processor for your tasks. Instead of writing custom code for database connections, API calls, or data transformations, you can configure components onto your canvas for your specific needs.
Core connectors
Studio's core connectors address the most common integration scenarios and are organized into logical categories, making finding the right component intuitive. Here are some essential connectors:
- The HTTP connector handles REST API calls and connects to web services, supporting different ways to authenticate and various request formats.
- The database connector provides JDBC-based connectivity to relational databases with connection pooling and transaction management.
- The file connector manages local and remote file system operations, including reading, writing, and monitoring changes.
- The FTP connector handles file transfers when working with older systems that use traditional FTP protocols.
- The email connector handles sending messages and notifications to automate communications.
In addition to these, there is also a Transform Message component that handles data manipulation. It launches the DataWeave editor, where you can convert between data formats, filter out what you don't need, and do calculations.
Flow control components
Flow control components manage messages moving through your integration logic, providing routing and processing patterns. Here are the key elements:
- The Choice Router implements conditional routing based on DataWeave expressions, directing messages to different paths based on content or attributes.
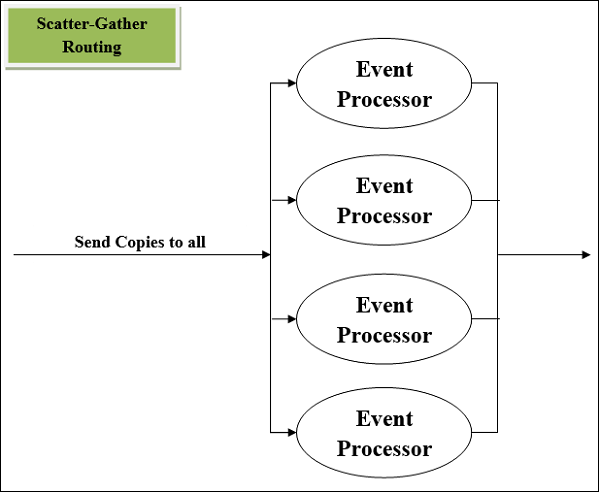
- Scatter-Gather executes multiple operations simultaneously and aggregates results, making it perfect for parallel processing scenarios.
- The For-Each processor handles collections by processing each item individually, while Parallel For-Each adds concurrent execution for improved performance.
Here is a schematic diagram of how the Choice and Scatter-Gather components work in a Mule flow.

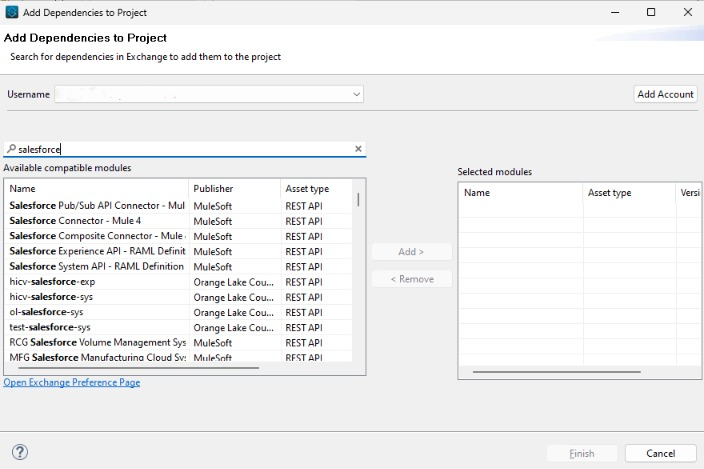
You can also discover and install connectors directly from Exchange without switching between applications. When you need a specific connector, search Exchange and add it to your project. Studio handles all the dependency management behind the scenes, updating your pom.xml automatically.
DataWeave Transformation Editor
The DataWeave editor offers transformation and development features that speed up complex mapping scenarios.

The editor excels at handling complex transformations involving nested objects and arrays. DataWeave's functions make operations like filtering, mapping, and grouping intuitive.
This example shows how to process order data by filtering active orders, extracting items, and grouping them by category.
Here is an input payload.
{
  "orders": [
    {
      "orderId": "A1",
      "status": "active",
      "items": [
        {"name": "Laptop", "category": "Electronics", "price": 1000},
        {"name": "Mouse", "category": "Electronics", "price": 25}
      ]
    },
    {
      "orderId": "A2",
      "status": "canceled",
      "items": [
        {"name": "Book", "category": "Education", "price": 15}
      ]
    }
  ]
}
DataWeave transformation
%dw 2.0
output application/json
---
payload.orders
  filter ($.status == "active")        // Only active orders
  flatMap ($.items)                    // Get all items from active orders
  filter ($.price > 20)                // Only items over $20
  groupBy ($.category)                 // Group by category
Output
{
  "Electronics": [
    {"name": "Laptop", "category": "Electronics", "price": 1000},
    {"name": "Mouse", "category": "Electronics", "price": 25}
  ]
}
CurieTech AI also has a DataWeave Generator tool that creates optimized transformation code for your Mule flows. You must provide sample input and output data to the DataWeave Generator tool.
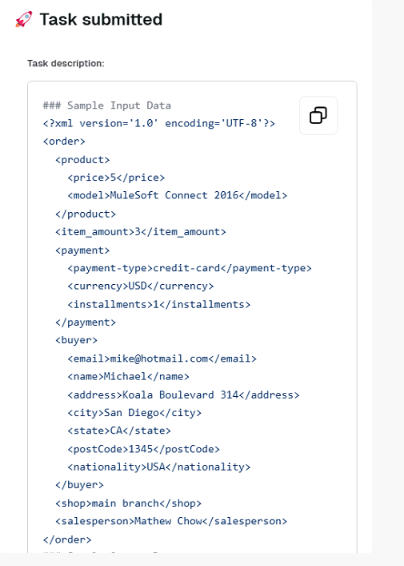

The tool generates efficient DataWeave code based on the sample input and output, reducing transformation development time.

Studio Debugger
Anypoint Studio's debugging environment provides detailed insight into your flow execution through features like breakpoints, payload inspection, and step-through execution. It reorganizes Studio's interface to prioritize debugging tools and runtime information.
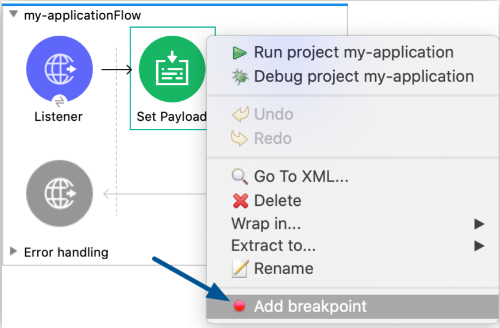
Setting breakpoints on message processors pauses execution, allowing you to examine payload or variable values. Right-click any processor and select "Add Breakpoint" to create a pause point during debugging sessions.
Step-through execution control
Step-through debugging lets you advance through flows one processor at a time. Use “Step Over” to execute the current processor and move to the next, or “Step Into” to debug sub-flows and custom Java methods. This detailed control helps you identify exactly where problems occur.
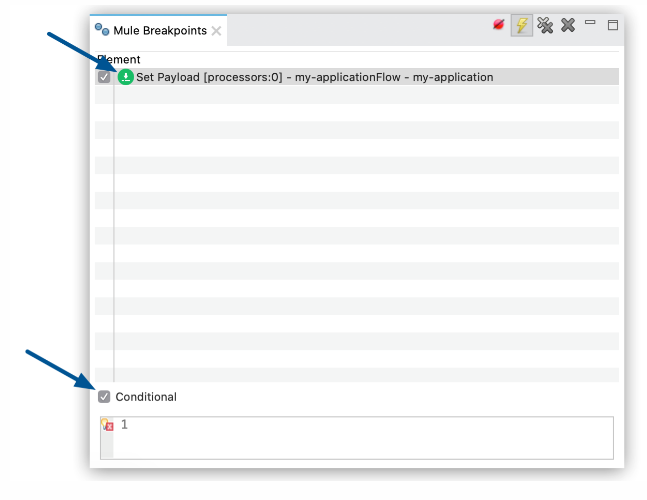
Conditional breakpoint configuration
Conditional breakpoints with DataWeave expressions provide targeted debugging. You can configure breakpoints to pause execution only when specific criteria are met, rather than stopping at every execution. For example, payload.status == "error" stops execution only for error conditions.
MUnit testing framework
MUnit integration in Anypoint Studio offers automated testing features for Mule applications. You can build, run, and review detailed test suites without leaving Studio, so you catch issues early and ship more reliable integrations.
Creating test suites starts with right-clicking your integration flow and selecting the MUnit option. Studio generates basic test structures, including setup, execution, and assertion phases.

When setting up tests, you will configure mock behavior by dragging mock connectors from the Mule Palette, preparing your test data, and defining the expected results.

Basic MUnit test structure
This example shows a test that validates a customer API flow by mocking a database response and verifying the output:
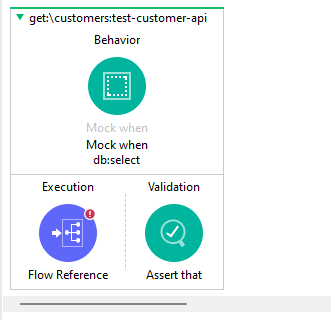
<munit:test name="get:\customers:test-customer-api" description="Test customer API flow">
    <!-- Setup: Mock external database call -->
    <munit:behavior>
        <munit-tools:mock-when processor="db:select">
            <munit-tools:return-value>
                <![CDATA[{"customerId": "123", "name": "Test Customer"}]]>
            </munit-tools:return-value>
        </munit-tools:mock-when>
    </munit:behavior>

    <!-- Execution: Call the flow -->
    <munit:execution>
        <flow-ref name="get-customer-flow"/>
    </munit:execution>

    <!-- Assertion: Verify the result -->
    <munit:validation>
        <munit-tools:assert-that expression="#[payload.name]"
                                 is="#[MunitTools::equalTo('Test Customer')]"/>
    </munit:validation>
</munit:test>
Mocking external systems
Mocking external systems prevents tests from depending on live connections during development. MUnit can mock HTTP calls, database queries, and connector operations, ensuring tests run consistently regardless of external system availability.
The MUnit test recorder is also an excellent feature of Studio. It automates test generation by capturing flow execution and creating corresponding test cases. This feature accelerates test creation for complex flows with multiple processing steps.
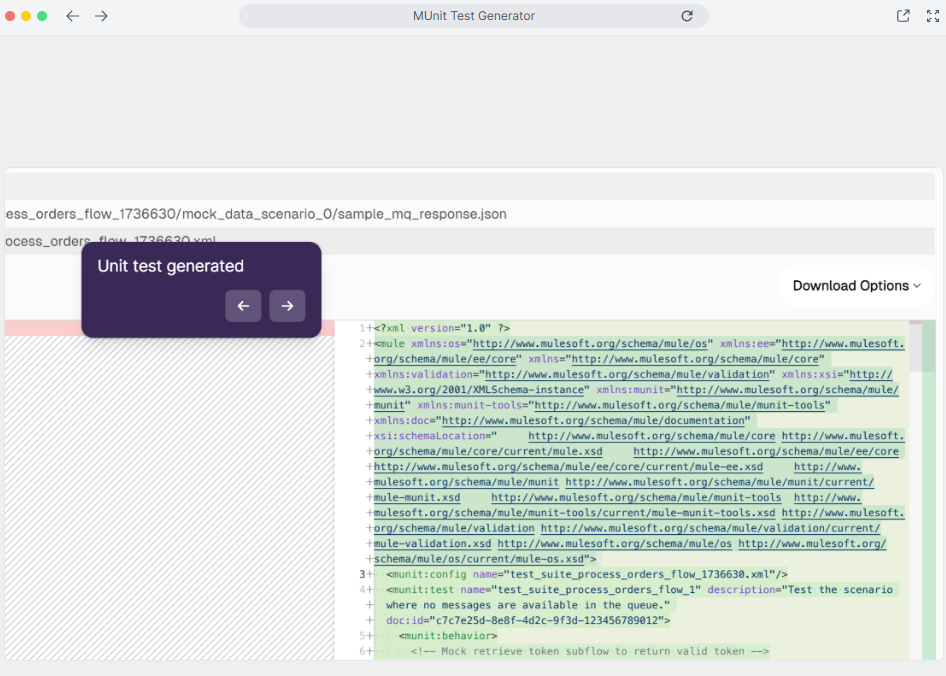
With CurieTech AI's MUnit Test Generator, you can create test cases for your Mule flows. To use the tool, you connect to your repository or upload your Mule application from your computer. Select your runtime version and specify the name of the flow you want to test.
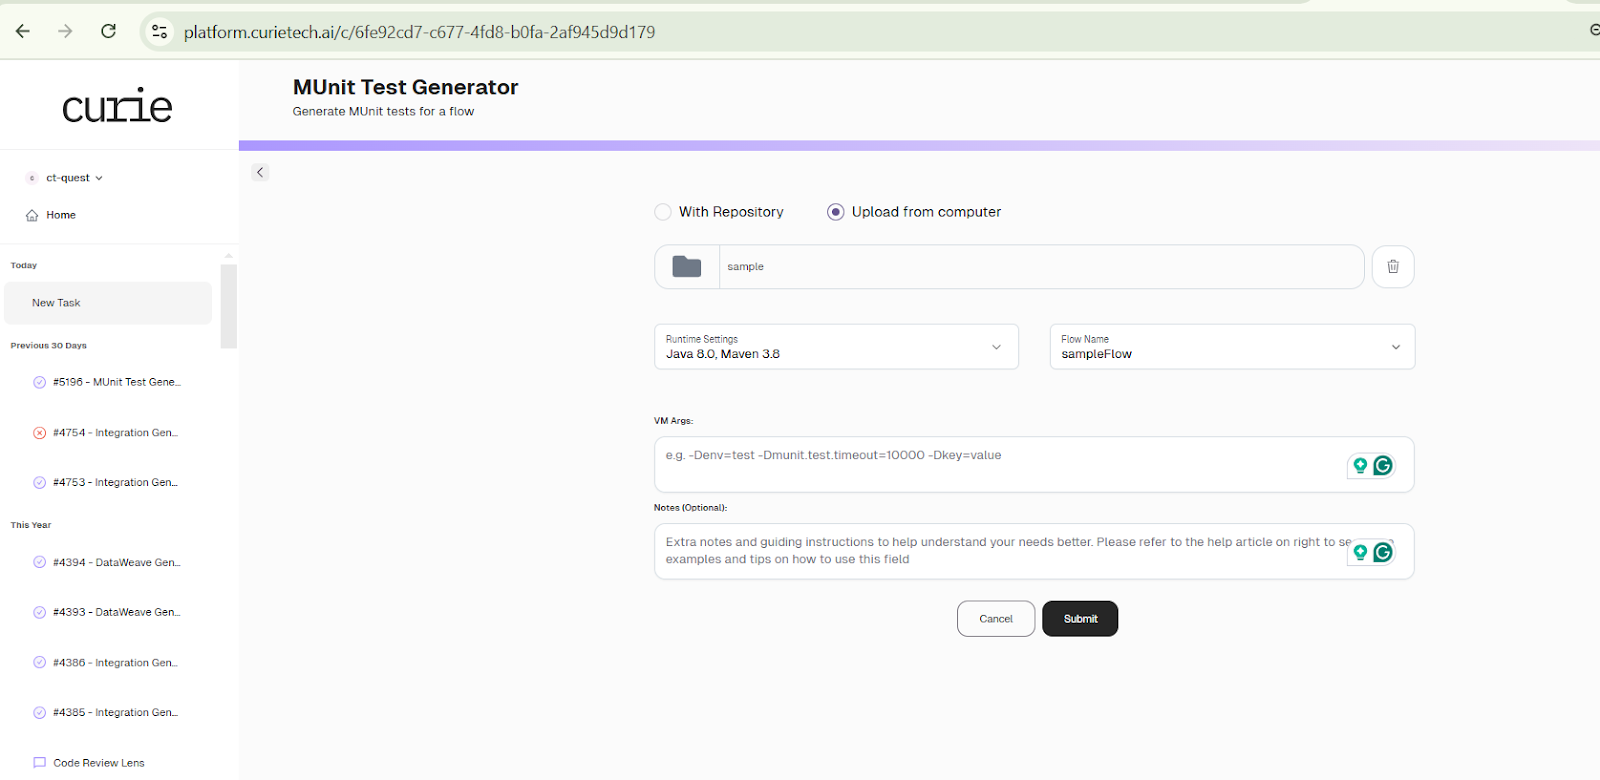
The generator then analyzes your flow, identifies all external calls, and generates test suites with appropriate mocking and assertions.
Studio Git integration
Anypoint Studio lets you set up Git repositories using Eclipse's built-in Git capabilities, enhanced with Mule-specific features. You can initialize repositories, clone existing projects, and manage branches directly from the Studio interface.
The Git perspective shows repository status, staged changes, and commit history. You can stage files, write commit messages, and push changes without using external Git clients.
Best practices for Mulesoft Anypoint Studio development
Some best practices are given below.
Create reusable sub-flows for modular design
Create modular sub-flows for common processing logic that multiple flows can reuse. Instead of duplicating transformation or validation logic across flows, you can extract shared functionality into sub-flows that accept parameters and return processed data.
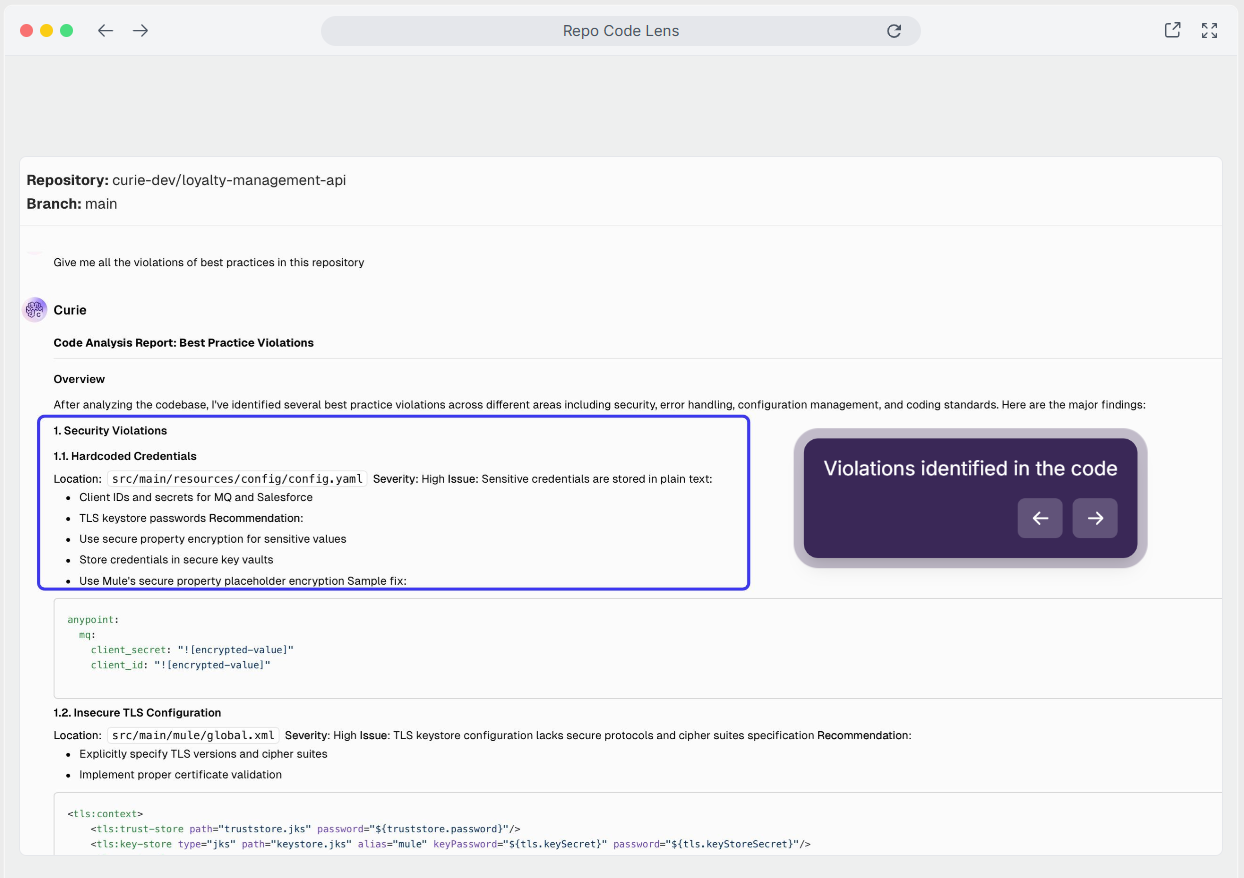
CurieTech AI's Single and Multi-Repo Code Lenses analyze sub-flow reusability patterns across your projects. To use the Repo Code Lens, you connect your repository and ask specific questions about your flows, endpoints, or code implementation.
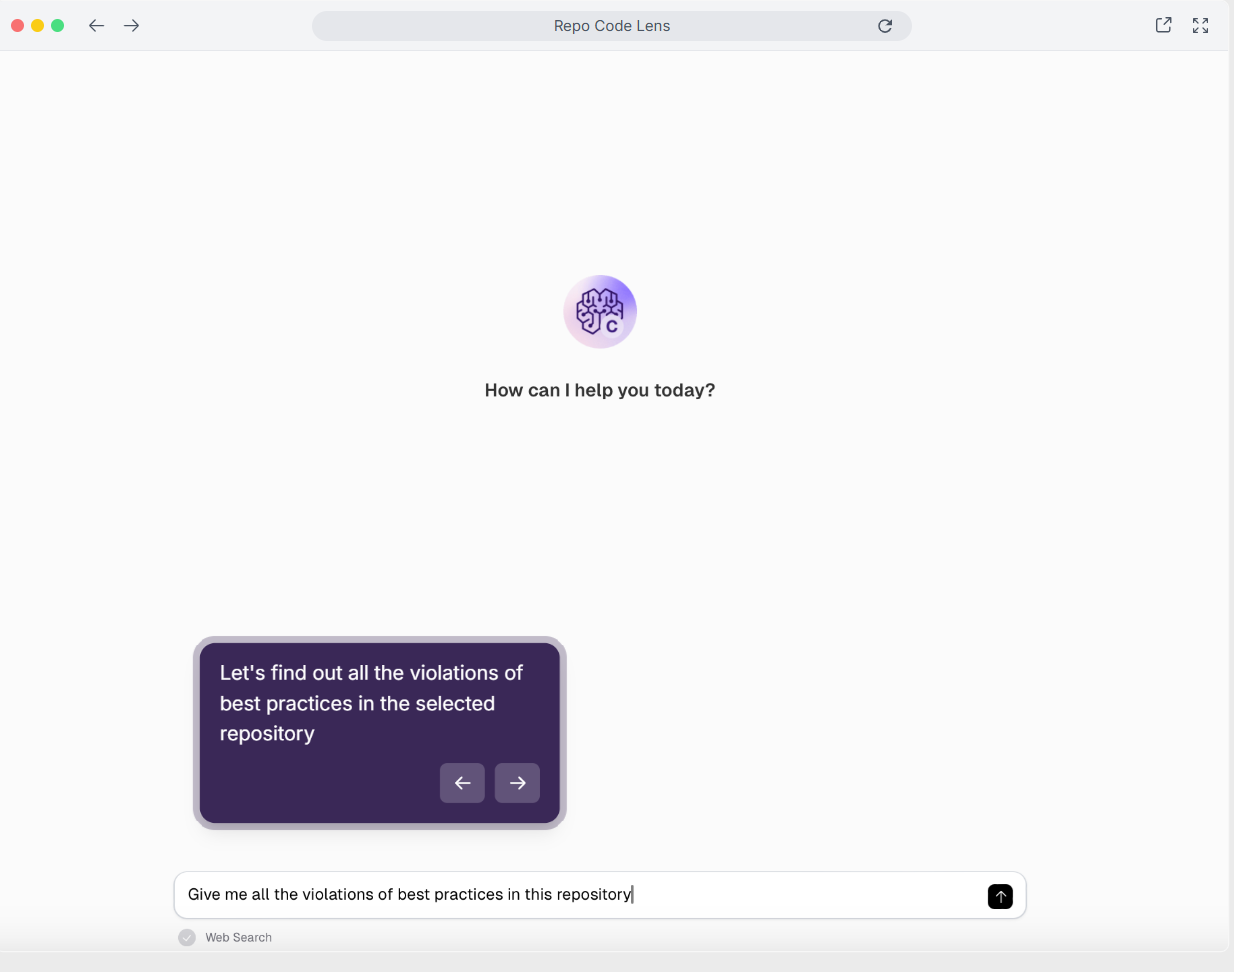
Once the script is processed, the tool provides insights about whether specific flows follow organizational guidelines, identifies security issues, and suggests optimization opportunities.
Use global configurations for connection management
Create reusable global configurations for all your connectors and connection types that multiple flows can reference. Global configurations simplify environment-specific changes and reduce duplication.
Put your connection settings in global elements so any flow can use them. For example, when you need to change a database URL or API endpoint, you only have to update it in one place instead of updating multiple flows.
Configure global error-handling patterns
Implement global On Error Continue and On Error Propagate strategies that provide consistent error responses across your application. Global error handlers catch exceptions not handled by flow-specific error scopes.
Establish proper logging and monitoring strategies
Use Logger components with appropriate log levels throughout flows to capture essential processing information. If you want detailed troubleshooting, set the logger level to DEBUG. Use INFO to track normal processes for other scenarios, WARN for recoverable issues you can handle, and ERROR when critical exceptions occur.
Log payload and variable information for debugging purposes, but avoid logging sensitive data like passwords or personal information. Include correlation IDs to trace transactions across multiple systems and processing steps.
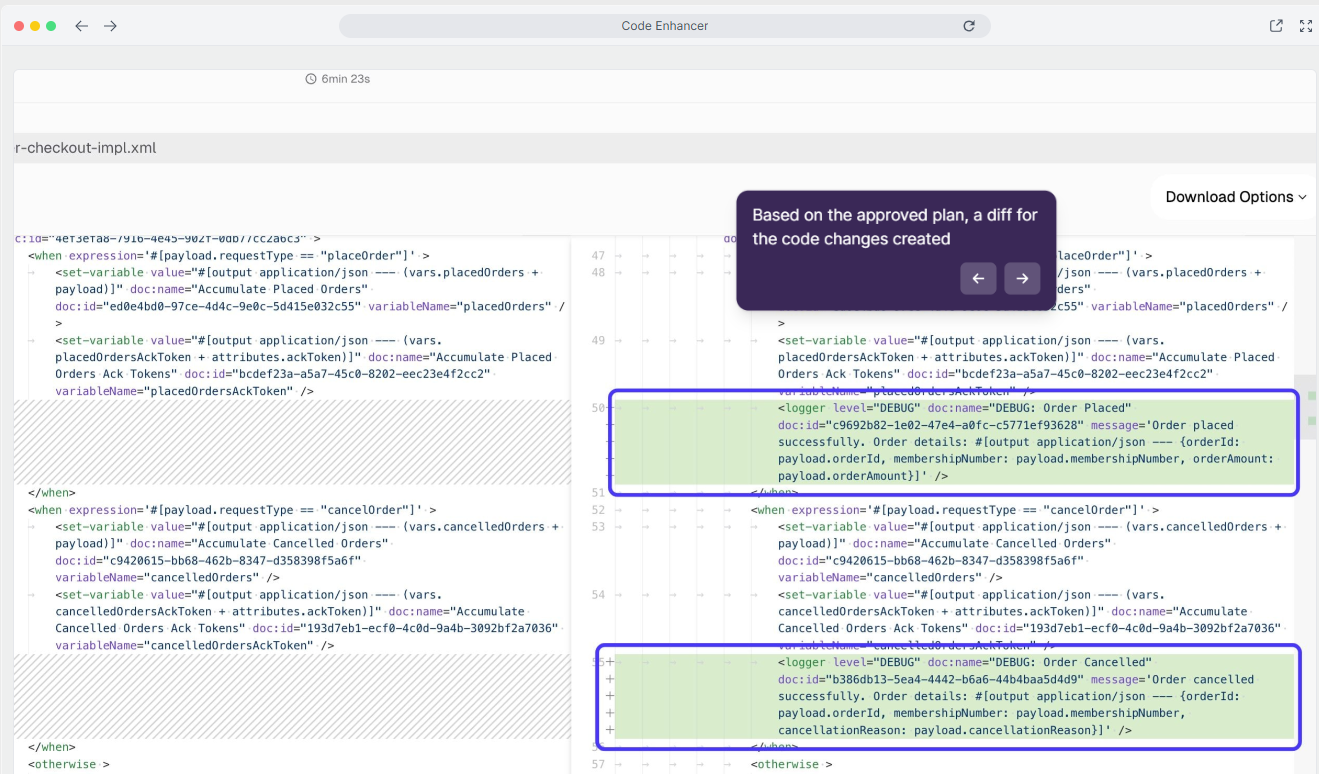
Use tools that further drive efficiency
With CurieTech AI’s Code Enhancer, you can easily update connector versions, enhance and update transformations or flow logic, add logging messages, and refactor the code. You must connect the project repository and prompt the necessary changes in the description.
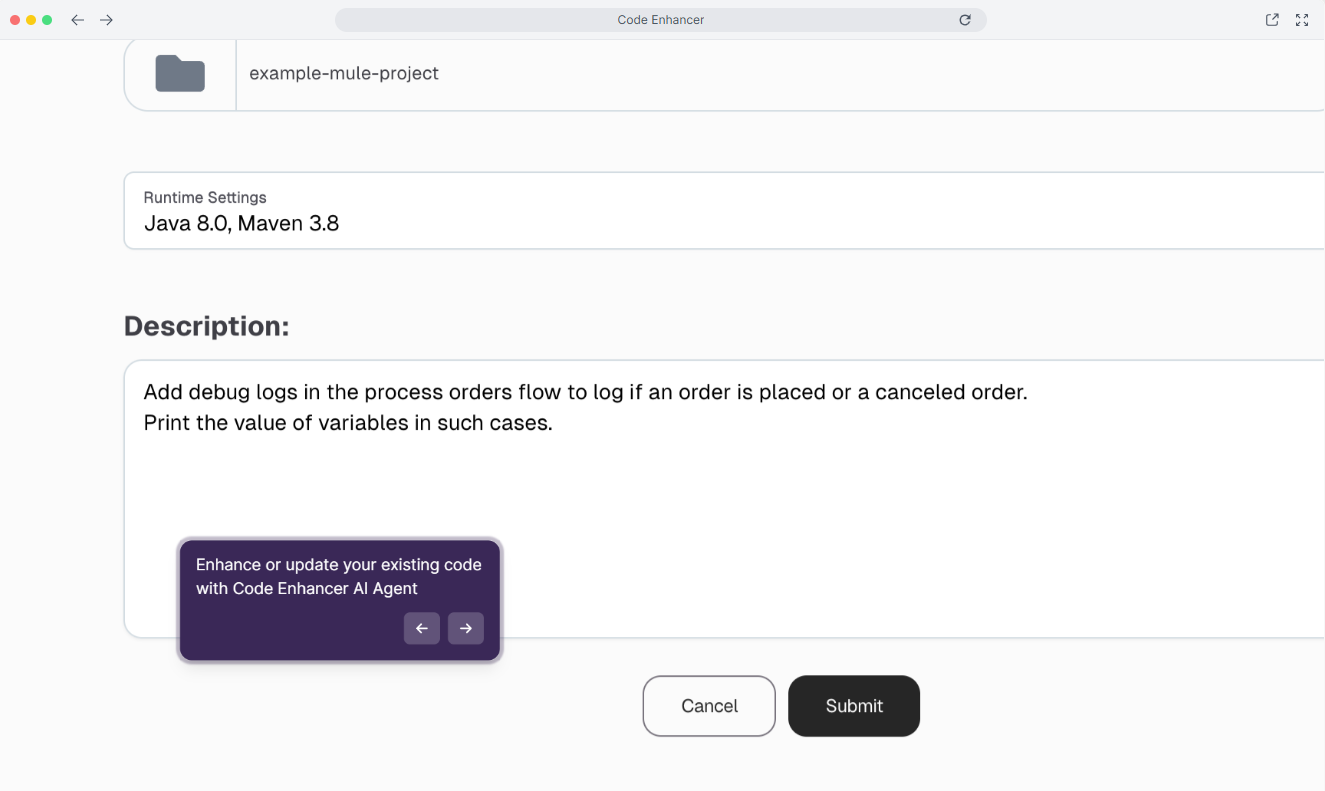
The tool analyzes your prompt and generates the code.
{{banner-large-table="/banners"}}
Conclusion
MuleSoft Anypoint Studio's Eclipse-based architecture, features, and tools provide a complete development environment enhanced with a visual flow design experience. Combined with CurieTech AI tools, you get an efficient platform for enterprise integration projects. AI-led automation helps create flow, optimize transformations, generate comprehensive tests, and maintain code quality standards.